and so for my first assignment as a glue dots dottie (a halloween theme project) i decided to make a monster themed treat bag. which would be perfect as a halloween party favor or for kids to take to school and pass out to their classmates.
i started with a small treat sak, i purchased it from target for $1. the treat sak is 6 1/2 in tall x 3 in wide. i used my t-square ruler and bone folder to score the top of the bag at 1 1/4 inch. i purchased the monster stickers at michael's arts and crafts stores. but if you're looking for similar monsters you can purchase them HERE
then i got started on the decorative part of the bag. i cut black cardstock to 5 x 3 inches, and cut purple cardstock 4 3/4 x 2 3/4 inches.
i cut a strip of designer paper 1 1/4 x 3 inches, and matted on black cardstock 1 1/2 x 3 inches. for the sentiment i used maya road chipboard letters. looking for similar chipboard letters, you can purchase them HERE
i used colorbox chalk ink in lime green to color the raw chipboard letters. i inked the letters on top of rangers kraft mat, which it perfect to ink on, because it wipes clean so easily.
next, i cut a 2 1/2 inch circle on my cricut, using the george and basic shapes cartridge, with black cardstock. i adhered it to the purple cardstock, with about a quarter of the circle hanging off, and trimmed that part off with tim holtz tonix scissors.

then i began adhering my layers together. i used glue dots memory book dot n go adhesive. to attach the chipboard letters i used mini glue dots.
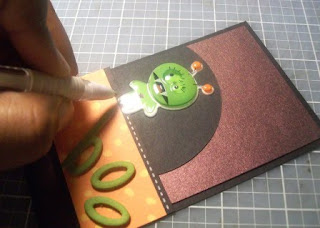
then i added the little monster sticker to the simi circle, and used a white gel pen to add faux stitching detail.
next i wanted to add star shaped brads as embellishments. i cut off the prongs on the back of the brads, and used glue dots to adhere them. then i adhered all the layered pieces to the treat bag.
at this point i added the candy, because i was getting ready to close the bag.
i folded the top of the bag over, and marked with a pencil where i wanted the ribbon to go through, and used my we r memory keepers crop-a-dile to punch two holes, and string the ribbon through, and tied it in a bow.
as a finishing touch i added rangers purple stickles to give the stars a purple glittery shine.
I wrote this blog post while participating on the Glue Dots design team
thanks so much for looking
blog ya later!


This is adorable! I love it!! Way to go fellow Glue Dots Dottie!
ReplyDeleteSuper super cute. Love it. The details are fun!
ReplyDeleteThis has to be one of the cutest halloween treat bags ever! So fun! :)
ReplyDeleteCongratulations! What a cute project.
ReplyDeleteWow this is a most impressive post. The tutorial must have taken forever...love that you showed so many steps. Love the project :)
ReplyDelete