Saturday, December 3, 2011

you're fabulous!


hello crafters,
the inspiration for this card came from the sentiment. which is from  hero arts essential messages stamp set. I immediately thought of my hampton art graphic 45 cling vintage ladies stamp set.


doesn't this lady look fabulous! i really felt this sentiment was the perfect complement to this stamp.
 i stamped her on a light white and yellow designer paper page from my minds eye's stella and rose collection hattie 6x6 paper pad, using distress ink in walnut stain. i cut out the image leaving a thin white border around the lady, adhered to teal designer paper and trimmed out the lady again.


the card is a standard A2 sized card, but i covered the front with designer paper and free hand cut a curved edge into the front flap of the card. the scallops strips were cut using fiskars scalloped sentiment punch. the flowers were cut using my cricket, the cartridge used was the george and basic shapes and they were cut at 1 inch. the pearls are recollections. i stamped the sentiment on designer paper using moment ink in tuxedo black.

thanks for checking out my blog, please comment and leave any questions below as well.
blog ya later,
avgscrapgirl

Thursday, December 1, 2011

noel


it's the most wonderful time of the year. . . it's finally december and the official countdown to Christmas has begun.

this simple Christmas card was made using k&co's yuletide chrismas collection. the card base is black recollections cardstock, i purchased the sheer shimmery gold ribbon and the black velvet ribbon at michaels. the tree is a chipboard sticker, that i embellished with red and white recollections rhinestones. for the sentiment i adhered a sticker to black cardstock and cut a thin border to help it stand out from the designer paper. 


thanks for stopping by my blog. hope you're enjoying your countdown to Christmas as much as i am.
happy holidays :)
blog ya later
avgscrapgirl

Tuesday, November 29, 2011

the first christmas card of the year


hello crafters,
here it is, my first christmas card of the year. christmas is my favorite holiday, and breaking out my christmas supplies always give me a little thrill. i just love this time of year, and the sentiment of this card perfectly describes how i feel-joy :)

i started with kraft cardstock, and layered black cardstock, and designer paper.


this is a very simple card to make, the designer paper is from K&Co's yultide collection, and the ornaments are chipboard stickers that i had in my stash from last year. not sure what brand.


the embossed sticker that i used for the sentiment is recollections. i adhered it to black cardstock and cut it out. the black border really helped it pop off the background paper. the ribbon is from my stash. i added a few rhinestones to the center of some of the snowflakes in the background paper as a finishing touch.


thanks for stopping by.
blog ya later,
avgscrapgirl

Saturday, November 26, 2011

mini me


hello crafters,
brace yourself, this is going to be a long post. . .
i made a coaster mini album using coasters that i purchased at michaels. i named it mini me becuse it's a mini album that's all about me (clever right-lol!)
so let's get right into the mini.
the first thing i needed to do was cover the coasters.
COVER THE RAW EDGES OF CHIPBOARD USING DISTRESS INK IN WALNUT STAIN (YOU CAN SKIP THIS STEP IF YOU WANT, I'M GOING TO EGGE THE SIDES AGAIN ONCE I COVER WITH PAPER)

USE A CROP A DILE TO PUNCH A HOLE
I CHOSE DESIGNER PAPER FROM MY MINDS EYE'S STELLA AND ROSE COLLECTION THE GRETTA 6X6 PAPER PAD
TRACE THE SHAPE OF THE CIRCLE AND CUT OUT THE DESIGNER PAPER WITH SCISSORS


TRIM EXCESS PAPER WITH A CRAFT BLADE
SMOOTH EDGES USING BASIC GREY'S PRECISION FILE SET
USE DISTRESS INK IN WALNUT STAIN ON EDGES

CIRCLES CUT USING COLUZZLE AND EDGED WITH DISTRESS INK IN WALNUT STAIN. FLOWERS AND RHINESTONE FLOURISH BY RECOLLECTIONS, VELLUM DIE CUT K&CO ABRIANNA COLLECTION
BANNERS CUT FROM DESIGNER PAPER, FLOWER CUT ON CRICKET USING GEORGE AND BASIC SHAPES, BUTTERFLY IS MARTHA STEWART 3 IN 1 PUNCH, VINE GLITTER STICKER IS RECOLLECTION


CUT SIMI CIRCLE AND ADHERE TO MAKE POCKET. TRIM BY RECOLLECTIONS ADHERED WITH HOT GLUE. FLOWERS BY RECOLLECTIONS. CUT TAGS FROM DESIGNER PAPER. RUB ONS ARE K&CO ABRIANNA COLLECTION
I LOVED THIS LEDGER PAPER AND REALLY DIDN'T WANT TO COVER IT (SO THIS WILL BE A PERFECT PAGE FOR JOURNALING) SCALLOP BORDERS CUT WITH MARTHA STEWART PUNCH, FLOURISH IS A LEFT OVER SCRAP


CUT LEFT OVER SCRAPS INTO STRIPS, DISTRESS WITH WALNUT STAIN DISTRESS INK, USE FISKARS SCALLOPED SENTIMENT PUNCH, STAMP IN CORNER OF JOURNALING BLOCK IS INKADINKADO, BUTTERFLIES ARE MARTHA STEWART 3 IN 1 PUNCH, RHINESTONES ARE RECOLLECTIONS
CUT STRIP AND 1 1/8 INCH AND 1/4 INCH WIDER STRIP TO MAT THE PAPER. PUNCH CIRCLES WITH CIRCLE PUNCH, EDGE WITH DISTRESS INK. FLOWER AND RHINESTONE FLOURISH ARE RECOLLECTIONS
CUT SEMI CIRCLE LAYER FISKARS SCALLOPED SENTIMENT PUNCH. FLOWER CUT ON CRICKET USING GEORGE AND BASIC SHAPES, RHINESTONES ARE RECOLLECTIONS, BANNER CUT FROM DESIGNER PAPER.

I really enjoyed making this mini. I'm hoping that I'll get a new tripod and some new video editing software for christmas and i'll do a video tutorial on the next mini that I make. 
Thanks for stopping by my blog, if you have any questions please leave them in the comments. 
blog ya later,
avgscrapgirl 

my craft journey part 3


hello crafters,
welcome to part three of my craft journey. this is all about mini albums and altered projects. i group these two paper crafting style projects together because they use similar supplies. what i love about altered projects and mini albums is the dimension that you can put into your projects. with standard albums that have page protectors it's best to have supplies that are flat, for me when it comes to mini albums the thicker the better.
transitioning from scrapbooking and cardmaking to altered projects was interesting for me because it really expanded what i considered a craft supply. i was no longer limited to the "scrapbooking" isles in michaels. i was now browsing in the wood section and even the wedding section of the store looking for supplies. when it comes to altered projects you can alter or embellish anything you'd like.

 this part of paper crafting is all about thinking out of the box-you're no longer restricted to a 12x12 layout or an A2 sized card, the possibilities are endless.

common altered projects include: picture frames, cigar boxes, jewelry boxes, notebooks, favor boxes, stick pins and tags to name a few.
mini albums: as the names imply are smaller than the traditional 12x12 or 8x8 albums. Usually they're 6x6 or smaller. you can use a 6x6 album, but it's more fun to grab some chipboard and make your own album. it can be square or a circle or any shape you can die cut.

the other thing i love about altered projects are swaps! you can join a swap site and enjoy making new friends and exchanging beautiful projects with each other. 

so here are the tools you'll want to add to your collection to get into altered projects and mini albums
tools

  • glue gun-a wonderful adhesive that's strong and quick drying and helps secure heavier items. 
  • kraft mat-if you didn't get one for cardmaking you're for sure going to need one now. to keep your cutting mat or work surface from getting stained. 
  • paint-perfect for coloring natural wood any shade you'd like
  • paint brushes
  • distress inks-another item you may already have if you picked it up while cardmaking. i primarily use walnut stain and vintage photo, but you can collect and use as many colors as you'd like. 
  • medium and lightweight chipboard. most scrapbooking stores sell 12x12 sheets of medium weight chipboard. i purchase mine at www.bluemoonscrapbooking.com. you can SAVE MONEY on lightweight chipboard by using cereal boxes-you're going to paint over or cover them with paper so no one will ever know it used to be a cheerios box. 
now for the splurge items.(check out part 1 of my craft journey for tips on stocking up on splurge items

  • die cutting/embossing machine like the big shot, vagabond, or cuttlebug
  • embossing plates and dies. 
  • sewing machine

  • cinch or bind it all
supplies
  • textiles: fabric or felt
  • feathers/leaves/sprays
  • charms/jewels/pearls
  • trims/ribbons/sequins/twine
  • tags
  • rhinestone flourish
  • border stickers/chipboard stickers
  • bookplates/nameplates
  • dimensional sitckers
  • glitter/shimmer : perfect pearls, glimmer mist, smooch spritz, and stickles.
  • crackle paint
brands that i love
  • graphic 45
  • 7 gypsies
  • recollections
  • tim holtz
  • websters pages
  • sizzix
now for a little inspiration, check out these youtube channels for amazing inspiration.
thank you so much for traveling along with me on my craft journey. the best part is that once you get to the end you can cycle back and start all over again, mixing and meshing different techniques and skills you've learned from each phase along the way. it's all about having fun and enjoying this hobby i love. 

Friday, November 18, 2011

youtube layout hop

if you've been following my blog for any amount of time you know i'm a youtube-junkie. my subscription list full of paper crafters. i used to watch primarily cardmakers and as i'm now transitioning into doing more scrapbooking i've been actively using the search box to find great layouts for inspiration. . .
. . . and i stumbled upon a youtube layout hop! which i certainly recommend you all check out.
the hop is for the month of november, there are 12 amazing scrapbookers, and be sure to leave comments on each page for a chance to win prizes!
start hopping here. . .


blog ya later,
avgscrapgirl

Friday, November 11, 2011

k&company abrianna recipe box

hello crafters!
for my latest altered project. i altered a recipe box that i purchased at michaels with k&company's abrianna collection. you can watch the video below or over at youtube. . . enjoy!


thanks for watching
vlog ya later
avgscrapgirl

Monday, November 7, 2011

a new toy. . .

. . .who doesn't love a new toy! i know i do.
i was at my local scrapbooking store A to Z Scrapbooking and i decided to pick up a corner chomper. i've been wanting one for more than a year now, and honestly what was keeping me from getting one was that i didn't have any complaints about my fiskars corner rounder-so i felt a little bad replacing it.
but while shopping for my corner chomper i was surprised to find out that the corner chomper also does more than just round corners, they also have decorative edges!
so then i considered buying just the decorative edge corner chomper and staying with my little fiskars corner rounder. but eventually gave into the lack of self control that usually grips me when i'm in a scrapbooking store and i got BOTH!

so here's what the original corner chomper does. give you rounded edges in both a 1/2 inch and 1/4 inch.

the decorative edge gives you a stub (which i LOVE- and used on a recent post) or a deco edge

thanks for stopping by. . . leave any questions in the comments
blog ya later
avgscrapgirl

Sunday, October 30, 2011

give thanks


hello crafters!
i hope everyone is having a great weekend. in the crazy busy schedule that is my life now that i'm a full time working adult who decided she should go back to school. i've managed to carve out a little time for the hobby i love and my poor neglected blog. (which got a facelift today!!-i love the new look, hope you do too!)

there were two inspirations behind todays cards. recently kristina werner did a youtube series called friday focus, and the focus was patterned paper. so i decided to challenge myself to make a card using all pattern paper-no cardstock!
which can be a little tricky because you can end up having a visually overwhelming -hot mess- of a card. but if you follow the rules of mixing patterned paper, which kristina explains so well-check out the link. you get a really great card!


the second inspiration came when i looked at the colors of patterned paper that i choose (all from my minds eye's stella and rose mabel 6x6 paper pad). they made me think of thanksgiving, which is a holiday that's coming up in the states.

so let's get close up and see what i did. . .

  • i had some fun rounding the corners of the card with my new making memories corner chomper with the stub corner. 
  • the paper bird is a recollections die cut i purchased at michaels earlier this summer for only $0.99! 
  • i added some twine tied into a bow with a mini glue dot. 
  • i created the rosette flower with patterned paper
  • and the rhinestone flourish are by recollections as well. 
  • the scallop border was created using fiskars scalloped sentiment punch
  • the stickers used to spell out the word "give" are making memories (super teenie tiny-perfect for cards)


  • i embossed using versamark ink, a hero arts stamp (from the bird, tree and messages stamp set-an oldie but a goodie!) and white american crafts zing embossing powder
thanks for stopping by the blog. if you have any questions please leave them in the comments. and please feel free to comment-they make my day a little (ok-a LOT) happier!
blog ya later
avgscrapgirl!

Tuesday, October 25, 2011

it's been so long. . .

. . . and i thought i should at least drop by my poor neglected blog and explain myself. just in case anyone cares to know where i've been all these months.
i started school, online i'm offically a phoenix. and i knew that starting school would cut into my free time, but i didn't realize how much by scrapbooking would suffer.
since i'm not ready to completely abandon my beloved blog, i will do my best to pop in every now and again. but if you're wondering where i am-i'm doing homework, and will be for a couple of years.

i am however, making time to do an 8x8 album for my new niece, just born sept 30th! when i finish i will be sure to post pictures of her album.
it feels great to get back to my scrapbooking roots, and to sit at my craft desk, and to SHOP for scrapbooking supplies again. honestly it's amazing how much changes when you're away for just a short while.
speaking of which, if anyone knows of a good scrapbooking line for a Baby Girl album, please leave it in the comments.
blog ya later
avgscrapgirl :)

Sunday, August 7, 2011

one stamp two ways part 2


hello crafters,
it's been a while. . . but i'm back to share part two of my one stamp two ways series.
for this card i decided to break out my copic markers. wanting to use a similar color scheme i reached for blue and orange.
I stamped my image with memories tuxedo black ink, which is a recommended ink for copic coloring.

the floral stamp is inkadinado, the sentiment is hero arts, the orange woodgrain paper is from Basic Grey's Life of the Party 6x6 pad, the scalloped border was created with fiskars scalloped sentiment punch and the rhinestones are recollections. 

thanks for stopping by,
blog ya later.
shawnte, the avgscrapgirl

Monday, July 11, 2011

one stamp two ways part 1


hello crafters
i've been working on a lot of altered projects lately, it felt good to sit down at my craft desk and make a couple of cards!
i purchased this inkadinkado individual clear stamp at my local big lots, and i was so excited to get started using it.


i used white embossing powder on recollection white cardstock. then used my ink essentials blending tool, and distress ink in wild honey, spiced marmalade, barn door, broken china, & stormy sky.
after coloring the flowers i cut them out. and layered them on the cardfront.
i added designer paper from stella and rose's mabel 6x6 paper pad. and punched a scalloped border, using fiskars scalloped sentiment punch.
i stamped the sentiment using a hero arts stamp anytime messages stamp set and momento tuxedo black ink.

i layered the orange flower using a glue dots craft dot. 
then finished the card by adding rhinestones to the center of the flower


thanks for stopping by
blog ya later,
avgscrapgirl

Monday, June 27, 2011

cards blog: animal shaped cards

happy monday crafters!
guess who was featured on the cards blog. . . ME! :)

the challenge was to create an animal shaped card. I used my cricket gypsy wanderings cartridge to cut out a bunny rabbit shaped card using papers from my minds eye's stella and rose collection.

blog ya later!
shawnte, the avgscrapgirl

Tuesday, June 21, 2011

youtube tuesday: lilypadcards

hello crafters,
ok, so i'm back with another youtube tuesday feature. this week i recommend subscribing to LilyPadCard's.


what you'll love about this channel:
if you're a card maker looking for a little inspiration this is the channel for you. vicky's craft style is so original and creative, and her tutorials will make you want to break out your embossing powder or your scissors and get to paper piecing!

hope this helps expand your youtube subscription list!
vlog ya later!
avgscrapgirl

Monday, June 20, 2011

using my scraps: thank you card set


hello crafter's
i recently purchased my minds eye's stella and rose collection 4 set of 6x6 pads. and couldn't wait to get started using them.
one thing i always find challenging is using my scraps, so i started making my first card and then made the second one from the scraps that came from the first.
i thought i was going to use those butterflies, but then i didn't
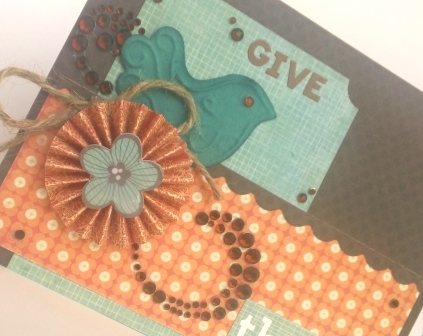
so i pulled out the papers and selected the print i wanted to use. cut the card to a square shape 4 1/4 x 4 1/4.


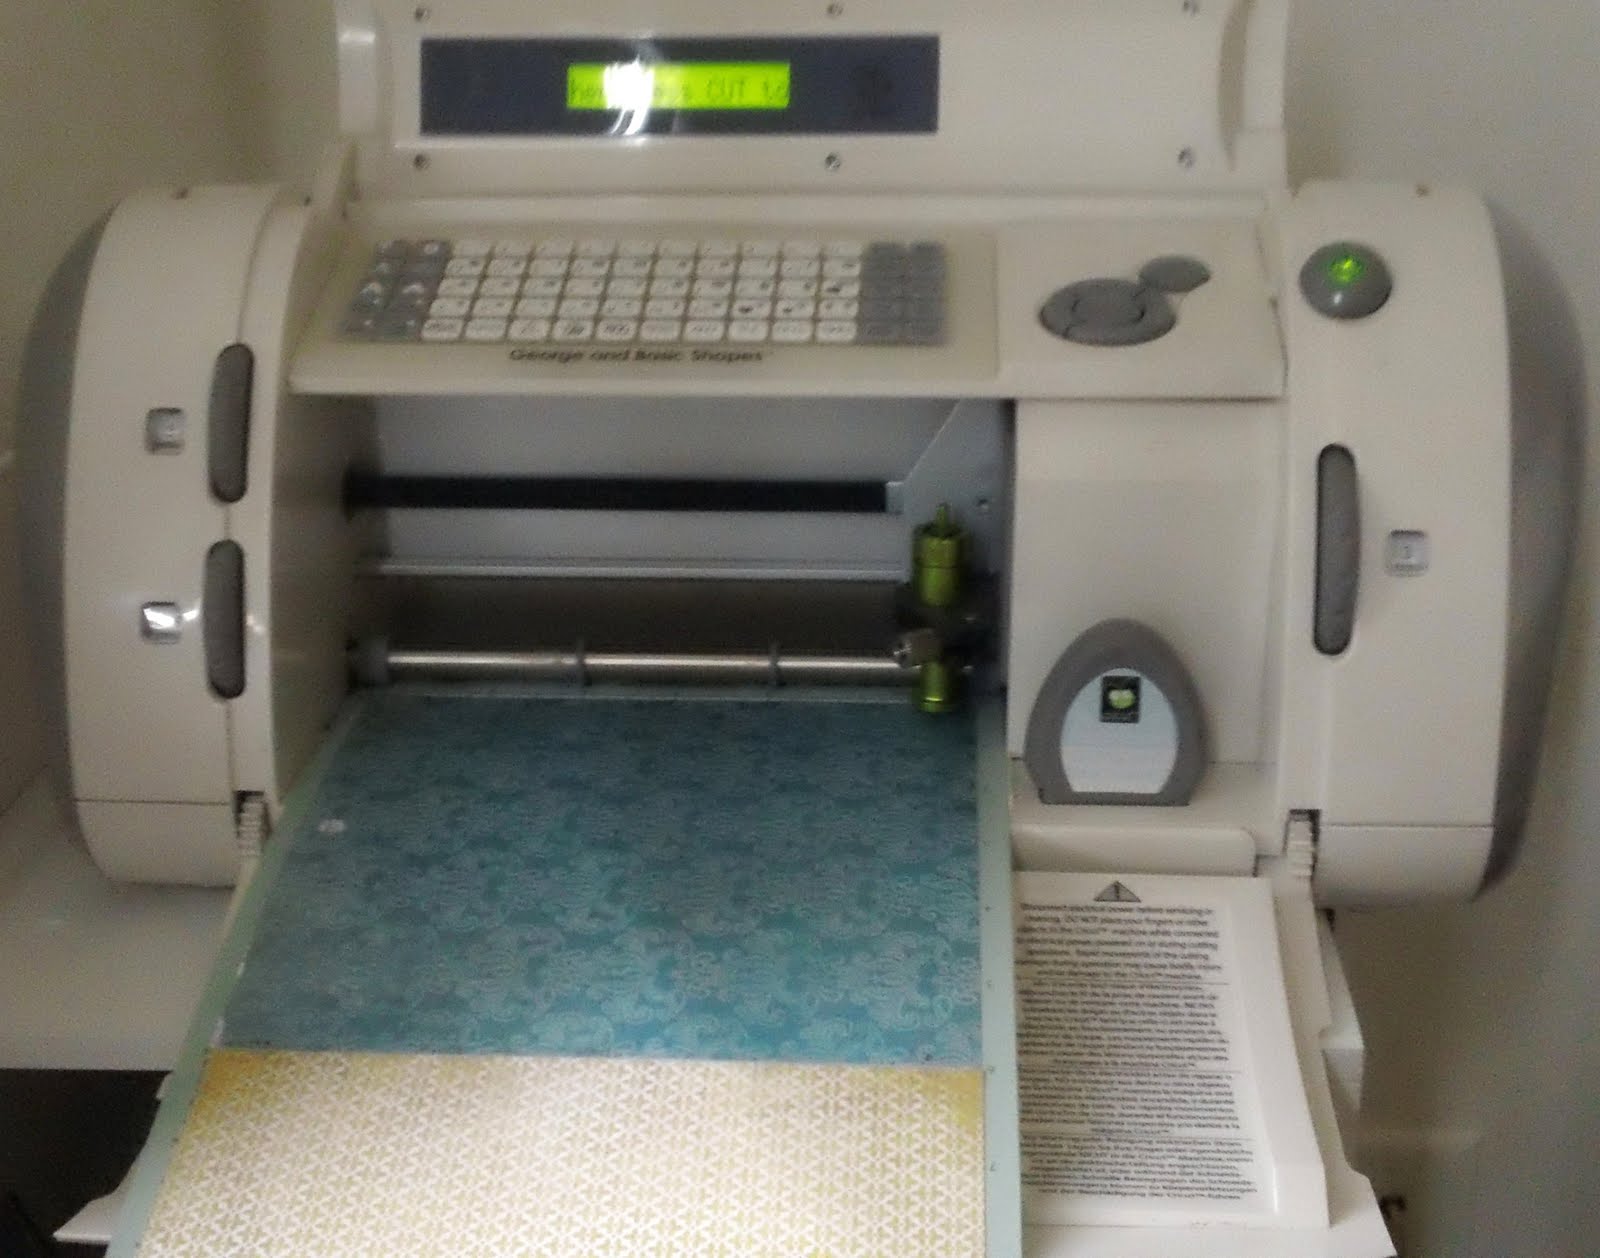
then i used my gypsy to cut out the (i'm not sure what to call that shape) & flower on my cricket.


i used mini glue dots to adhere a button to the center of the flower, then added martha stewart dimensionals to the frame and layered on the designer paper.

the stamp set is american crafts, and the ink is martha stewarts. one of the things i've learned from watching two pea's from start to finish class with nichol magourik is to use colore more when stamping my sentiments, instead of always using black, so it was nice to stampe the frame and sentiment in teal and olive green. 
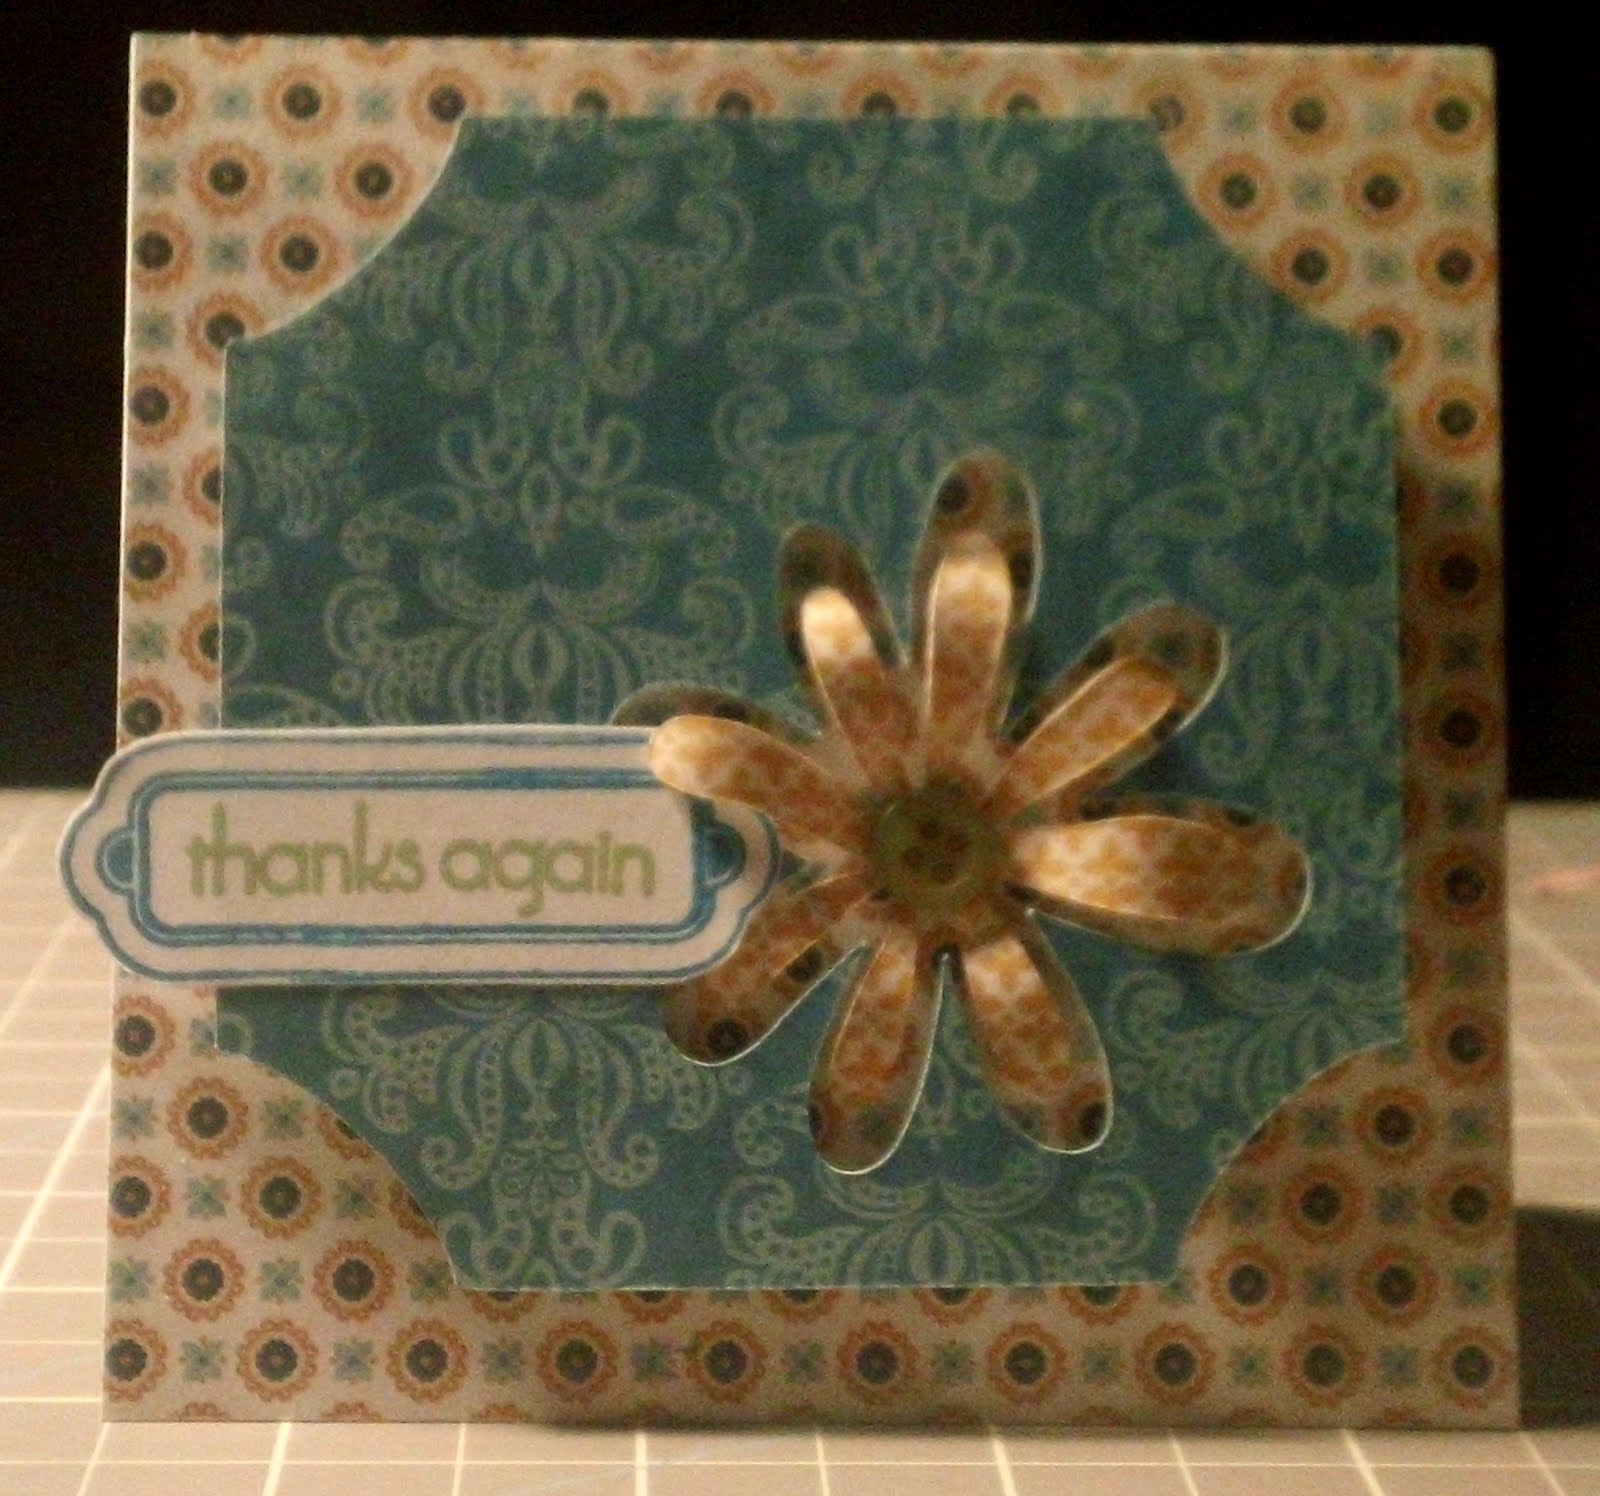
then i cut out the frame, and adhered it to the front of the card. and that's how i finished the first card, and then i realized that i had great scraps left over, and instead of storing them away in case i wanted to "use them later" i began using them to make the second card. 

i started by trimming down the paper that i cut the frame from, so that it was square, and adhered it to the designer paper. 
i used my 3/4 circle punch to create a center for the flower. i finished the card by adding glossy accents to the center, and stamping another frame and sentiment from the american crafts stamp set, and the martha stewart ink.


thanks for stopping by my blog!
blog ya later,
shawnte, the avgscrapgirl