hello crafters!
today i have a little bit of a throwback post. i'm going to do a photo tutorial, i was going to film myself making the card but i didn't have time to edit, so i decided to take some pics.
i purchased this inkadinkadoo stamp set at michael's. they were having an amazing clearance sale on stamp sets, and i couldn't pass this up at that great price!
the stamp set was the motivation for the theme of the card.
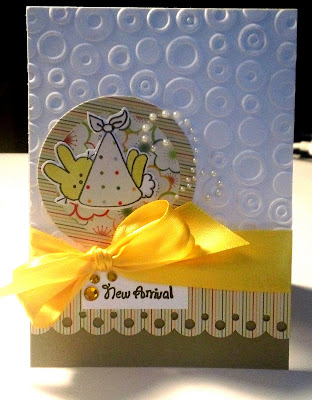
for the cardbase, i used kraft cardstock cut to a standard sized card, and i ran the white cardstock through my big shot with an embossing folder.
i started by stamping the image on white cardstock, and cosmo cricket's garden variety designer paper, using colorbox chalk ink in black.
then i paper pieced the blanket to the bunny rabbit, and colored the rabbit in with a pale yellow copic marker. and cut our the rabbit, leaving a thin white boarder, so that the stamped image would stand out from the print background.
i used my coluzzle circle cutter to cut out the circle piece that i wanted to use behind my stamped image.
next i punched a scalloped border strip from the same cosmo cricket paper pack, using martha stewarts border punch. i'm sorry i don't remember the name of this punch, if anyone knows please leave it in the comments, i would really appreciate it :)
then i began assembling my pieces on the card, i adhered the embossed white cardstock, scalloped border, circle piece, and wide yellow ribbon that i tied in a bow.
then i added some swirling pearl accents
lastly i stamped the sentiment on white cardstock, and cut it down to a small rectangle, and adhered right unter the bow, then added yellow queen and company rhinestones.
here's a close up shot of the card.
thanks for looking, enjoy the rest of your weekend :)
blog ya later!
shawnte, the avgscrapgirl


Shawnte, this card so adorable! I love everything it about it....the ribbon adds such a nice touch!
ReplyDeleteGorgeous card!
ReplyDeleteGreat tutorial! Your step-by-step pics are really crisp and clean. Thanks for sharing :)
ReplyDeleteI'm most definitely a follower of your blog!